Trainings Zoner
Udgangspunktet vores udarbejdelse af træningszoner er videnskablige anbefalinger. De tager udgangspunkt i for hvor meget kroppen skal belastes for at få en bestemt træningstilpasning.
Det kan være f.eks. med hvilken intensitet anbefales der skal være, for at få flere mitochondrier i sin udholdenhedstræning.
Vi arbejder ikke med traditionelle træningszoner som bliver beregnet ud fra en FTP-test.
Træningszonerne er meget mere individualiseret ud fra din fysiologiske profil: hvor høj er atletens VO2max("iltmotor") og VLamax("sprintmotor".
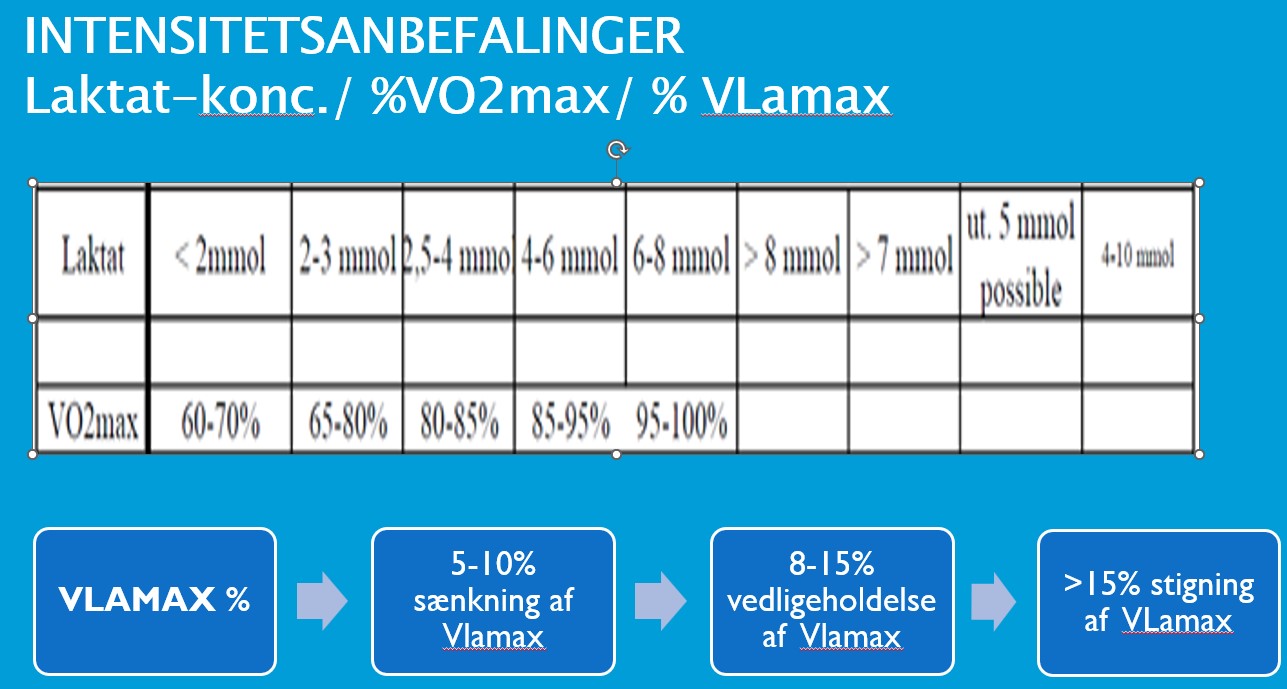
Billede-1 viser vores udgangspunkt for vores definitoner udregninger af træningszoner.
Billede 2 viser et eksempel for vores træningszoner for cykling. I udgangspunktet er det de samme for løb og svømning.